
Lawyer Podcast Benefits
As a lawyer, there are many ways to use a podcast to engage and help your listeners. The resulting connection can greatly benefit your law practice.
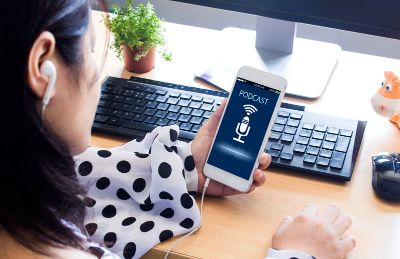
This is the best time in history to start a podcast. Podcasts are more popular than ever. Buzzsprout.com states that as of 2021, one-third of Americans over the age of 12 regularly listen to podcasts.
 Podcasts are used for businesses, hobbies, and branding. As an attorney, a podcast is a fantastic way to connect with people who need your services and prefer to consume content in audio format.
Having a podcast enables you to tap into an existing, dedicated audience base looking to learn and be entertained while exercising, driving, or doing mundane chores. It’s this ability to learn and be entertained while multitasking that has generated a dedicated fanbase for podcasting.
Because podcast fans are looking for something they can do while doing other activities, they may go to YouTube but are more likely to go in search of podcasts. This very fact suggests that when you start a podcast, you are expanding your reach and not just reaching the same audience you would find on YouTube.
As with your videos, your audio content can — and should — be posted to your own website. And just as your videos will be posted to YouTube for a wider audience, your podcast can be published on the many podcast directories available, such as Apple Podcasts and Spotify. This allows subscribers to listen via their platform of choice.
Podcasting is a far less congested arena than YouTube, making it easier for podcasts to gain traction. While there are currently less than 1 million podcasts listed in Apple podcasts, there are over 23 million channels on YouTube and over 500 million blogs. This means that for every one podcast, there are 750 blogs and almost 30 YouTube channels. These statistics point to podcasting as a good way to gain exposure for your law firm and expand your reach.
What Can A Lawyer Podcast Do For My Law Practice?
Build Trust
No matter how you reach out to potential clients, the most important element in building your practice is going to come down to one word— trust. By spending some of your time talking to your potential clients and giving them information, you forge a bond. People feel they really know the people they regularly listen to on podcasts. It’s an effective way to connect on a human level. One way it does this is by showing your personality. You can be sincere, down-to-earth, even witty. So long as you respect your audience and gear your “voice” both literally and figuratively to fit the topic at hand, you will connect if you show up regularly for your listeners.
Build Authority
When you provide answers to the legal questions people have, you become a trusted source for them, the “go-to” when they need help. When your podcast episodes are created from a client-education point of view, you regularly provide tons of value at no cost to potential clients. The reciprocity your listeners feel in consuming your podcast episodes forges a loyal connection.
In addition to fostering trust, your podcast builds authority. By consistently producing podcast episodes, your firm gains a reputation as a thought leader in its market. The reviews, comments, subscribers, and downloads add to the social proof of this status.
Your podcast can be used to share helpful information that builds your authority as an industry leader and to generate business by increasing awareness and building trust.
An Important List Building Tool
Like other content on your website that provides tons of informational value to your visitors, your podcast is an excellent way to grow your email list. By tying a piece of valuable downloadable content to each episode, such as a PDF guide, you use your podcast to encourage listeners to go to the website and download that content, which is already set up to collect contact information.
Expand Your Network
Your podcast can be used to engage and help other attorneys outside of your region by bringing them on your show for interviews from other perspectives and regions. This can expand the scope of information you offer to your listeners, and create reciprocal peer relationships.
How to Work Backwards to Provide Great Content
When producing podcast episodes, your best content will come from standing in your listener’s proverbial shoes. This means not using a scattershot approach to cover a lot of general information. It means addressing one important issue or answering just a few frequently asked questions that will benefit your ideal customer avatar.
Start by asking yourself some questions:
- Who is my ideal customer?
- What do they want?
- What are they motivated by?
- What difficulties do they have?
- What are their pain points?
- What are they afraid of?
- HOW CAN I HELP?
Even if your podcast uses an interview format, your most valuable episodes will be created when you approach a potential guest and say, “Here is what I want my listeners to get from this episode.” When you do this, you will begin to look for guests for your podcast because of their area of expertise and what information they can share with your listeners.
The bottom line for a great podcast is that it’s not about you. It’s not even about your rock star guests— it’s about your listeners.
Give them Value and They Will Follow
 Structuring your interview questions around what your listeners need will enable you to hone your episodes and provide maximum value. Starting with your ideal client in mind is a game-changer.
How To Build A Legal Podcast
What’s in a Name – Using Keywords the Right Way
When you name your podcast, you will want to make it clear to those searching for legal podcasts what you offer. The name itself should ideally be one or two words long, and no longer than four.
A note here: while brand recognition and your name are important, it’s more important that the podcast name be memorable and easy to spell.
If you feel you must include your company or name but it’s not it instantly clear what the show is about, you need to use your show’s title tag as a brief description to help with search visibility.
For example:
- A Slob Comes Clean [ the podcast name ]: Reality-Based Cleaning and Organizing [ the podcast title tag ]
This podcast name does mention the words “slob” and “clean,” and it’s catchy, which makes it memorable (important). However, the name does not automatically tell someone searching whether it is a podcast about cleaning and organizing, or a drama-based series, à la the old television show, “The Odd Couple,” about a slob and a “neatnik.”
It’s the title tag: “Reality-Based Cleaning and Organizing” that ensures anyone searching for “cleaning and organizing” will see this show in their search results. This is crucial.
This leads to a very important rule for naming your podcast:
Don’t Get Cute
It may be fun, but it’s no picnic if your audience fails to realize you exist or how you can help them. Opt for clarity over cute.
No matter how relevant your name is, it’s also important to keep it easy to remember and easy to spell. If listeners learn about you from another audio format source, such as another podcast, you’ll want them to remember your name to look you up later, if for instance, they are driving or working out when they hear about you.
If you are using your name as a title and it is difficult to spell, including a title tag with “personal injury attorney” or “divorce attorney” or something similar is going to be important.
Alternately, you may opt for a descriptive podcast name that is easy to remember, and use the title tag and branding to tie it back to your website and/or name.
Important “Housekeeping”
When you select a name for your podcast, there are two important things to check for that many people forget:
- Check that the URL for your podcast name is available
- Even if the URL is available, make sure the name you choose isn’t already being used by another podcast.
While you may think anyone taking the time to create a podcast would want the URL for a web page to put it on, that’s not always the case. Some people (usually “hobbyists”) create a podcast and only put it on a hosting site, like Stitcher, with no website of their own.
Later, a business may come along and assume there is no podcast with that name because the web URL is available. If you fail to check before purchasing the URL, you could get dangerously close to launching — or even launch — before realizing there may be a podcast that already bears that name.
While it is not actually illegal to post another podcast with the same name, doing so will not only cause a ruckus with the person who had the podcast first, but also can send listeners to the wrong place— a potentially more damaging scenario. Confusion and misdirected clients are never good for a business of any kind.
Create a clear line of sight to your podcast and your website and maintain the strength of your branding by making sure that the podcast name and URL that goes with it are available before you start creating episodes.
How to Utilize Your Podcast’s URL
If you already have a website, you may be asking yourself, “Why do I need another domain name?”
Even if you already own a website for your practice, you will want to register the domain of your podcast to make it easy for people to find the show notes for your episodes.
This allows you to forward the URL to the blog page of your website. You can post your podcasts to your blog page and then tell your audience your show notes are at YOURPODCSTNAME.com/episode#
Owning the URL allows you to easily direct your listeners to the podcast page of your existing website without having to change your website domain.
Name Your Episodes Intuitively
For example, if the podcast name is AwesomeAttorney.com
Episode 50 would be found at awesomeattorney.com/episode50
The show notes page of your website will actually be a blog post with the slug episode50
The Keyword Question
While it may seem like your slug should be the same as your keywords for the episode, it’s more important for listeners to be able to remember the URL for a podcast’s show notes page if they want to download a PDF or find other important valuable content (and you want to collect their email and build your list).
Remember that most of your listeners are into podcasts because they listen while doing something else. Whether that is driving, working out, or another activity, it could very likely mean they are not able to write the episode name down right away. That’s where the easy-to-remember podcast name and episode number for your show notes comes in.
If your listeners want to download something great from their favorite law podcast (yours), and they know every show notes page is named “episode” followed by the episode number, all your listeners need to remember is the episode number.
It makes the conversion from listening to getting to the show notes all the more likely if they must do so at a later time.
The same thing is true when they want to jot down the episode while doing another activity — all they need to note is the number.
What Format Should I Make My Show?
 There are a few ways you can deliver content in your law podcast. Because it’s important to have energy in your voice when you speak to convey warmth and enthusiasm in addition to knowledge, it’s best to choose a format that coincides with your comfort level.
Co-Host Format
Do you enjoy improv and back and forth conversation? Then a co-host will be necessary. In this case, it may be one of your firm’s partners or a paralegal. Who in your firm enjoys speaking?
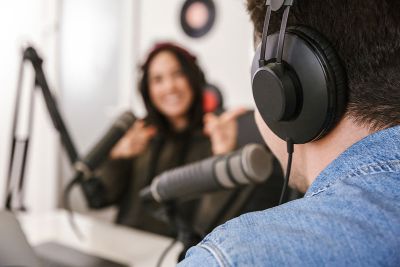
Interview Format
Another format that works well for people who like to have back-and-forth banter is the interview format. This involves interviewing experts in various fields related to your industry to provide helpful information to your clients. Examples of interview format podcasts are FBI Retired Case File Review and How She Did That.
A note about names here: These podcasts use titles that describe what they are about, rather than use the host’s name upfront. If you go to their websites, you will see that the site names are actually the host names.com, for branding. This is common and a good way to both get found on podcast directories and build your brand online.
Audio Drama Format
Do you prefer to plan your show out with a script? You could opt for an audio drama. Episodes might include having a host read a “based-on-a-true story” aloud that includes the characters doing a free legal consultation Q & A with the attorney.
Samples of scripted audio-drama podcasts are Crime Junkie, Serial, and Hardcore History.
Note: Hardcore History is another podcast example of a podcast name that draws its ideal customer avatar (ICA) but lands you back at the website named for its host, reinforcing branding.
News Format
This type of podcast would provide a synopsis of the latest law news. Examples of this type of podcast are The Daily and Planet Money.
Educational Format
This format involves a host peaking audience interest through teaching. Examples of this type of podcast are Online Marketing Made Easy and Quantum Revenue. Each of these podcasts also use a descriptive name but link back to the business website of the company.
How Long Should My Podcast Be?
While you may find an average podcast length of around 35 minutes, the truth about podcast length is that your podcast length needs to be as long as necessary and no longer. That said, it’s a good idea to break up podcasts that go beyond an hour into parts. This is not required, but a nice courtesy for your listeners, who may not plan on doing a three-hour workout to finish a long episode. This also makes it a bit easier for a listener to find their place if they somehow get knocked offline and are not brought back to where they left off.
The ultimate goal is to make it easy for your listeners to find you and keep them engaged.
No matter how long your episodes are, your job as a podcast host is to provide useful content. This means it’s a good idea to edit your episodes to at least some degree, taking out verbal stumbles, unintended noises (such as car horns or sirens). And, if it’s a conversation format podcast, you’ll need to remove any conversation that drifts off topic or answers to questions that ramble on. Staying on topic is important to keep your listeners engaged.
How Often Should I Publish My Podcast?
Depending on how often your podcast is published, it can be accomplished on the side or be a full-time job. If you’re only looking to devote part-time hours to it, you can publish every two weeks. Some podcasters publish daily, but naturally this requires full-time attention.
Once a week is ideal, if you have someone who can take on the task of production, but every other week is acceptable. Even monthly can work, though the more regularly you produce episodes, the stronger your connection with your audience will be.
What Equipment Will I Need to Podcast?
 While it’s possible to begin a podcast on your iPhone with a pair of headphones that have a microphone, it’s not realistic to edit and produce your podcast using your phone. You’ll want to do this on a device with a larger screen.
A note on quality here. While it’s true that content is more important than sound quality, sound quality does matter. Listeners will deal with less-than-perfect sound quality if your content is great. They will not, however, tune in to hear uninteresting content, no matter how great your sound quality.
That said, the cleaner the quality of your sound, the better. For this reason, you will benefit by purchasing a good microphone.
This is not as expensive as it may sound. There are several acceptable quality microphones on the market ranging in price from around $70 to just over $100. These include:
No matter which microphone you purchase, you’ll want to add a foam ball filter to cut down on wind-noise/breathiness. These only cost a few dollars. You can add other accessories as you see fit, such as a Pop-Filter for under $10.
Keep in mind that if you have a host who will be with you in the room when you record, you’ll need a second microphone. This is because good podcasting microphones are directional. They record sound focused from one source, rather than ambient sounds all around. The result is less noise pollution, but will require each speaker to have their own microphone.
What Software Do I Need to Record My Podcast?
You will need one or two software programs, depending upon your show’s format.
No matter what format you use, you’re going to need to use editing software to produce your episodes. If you have a co-host who is in another location or conduct interviews with remote guests, you are going to need a program to record your conversations.
Podcast Editing Software
If your podcasts are “solos” — meaning, you’re by yourself without a co-host or guest— the editing programs below can be used to record your episodes as well as produce them:
Free options:
Audacity (Open-source)
GarageBand (Mac and iOs)
Audacity is great for editing because of its pro-level features. It does have a significant learning curve, but you can find many tutorials and videos online to help you learn to use it.
GarageBand is more intuitive, making it more user-friendly, and it comes free with most Apple computers. It is not, however, available for Windows computers or phones running on Android.
There are others out there, but these will give you an idea of what to look for with regard to features and function.
Paid options:
Descript $15/month
Adobe Audition $20/month
Alitu $28/month
Hindenberg One-time $95 for Journalist version (30-day free trial)
Podcast Recording Software
Podcasts that use a remote co-host or interviews of people who are not in the same room with you will require the use of software to record both ends of the conversation.
Zoom and Skype have free options for recording your interviews, but as you’ll see below, there are strong reasons not to use these free versions.
Using the free version of Zoom, your conversations are limited to 40 minutes. While this may seem like enough time to do an interview, it often isn’t. You will be looking for a minimum of 20 minutes, and preferably 35 to 40 minutes of usable audio from your interview. That’s where the rub comes in— not all of your audio is going to be usable.
As interviews involve cordial conversations, at least part of your time will be taken up by “warm-up” chit chat with your guest before you get to your official intro. In addition, you’ll want to do a “soft close” after the interview. These two elements are important in building trust and a rapport with your guest, even if this part of the conversation will be cut from the actual episode.
The warm up and soft close don’t even factor in any ramblings you’ll need to cut to be diligent about sticking to on-point information. In addition, you should always assume that at least 10 minutes of time will be written off, should your guest stop mid-sentence and say, “Wait, that came out wrong, can I start over?” Or, they or you may get interrupted and need to step away and come back. These things may sound minute, but cumulatively they can add up to your conversation being abruptly cut off when a free Zoom account runs out of time.
And, even these situations don’t take into account technical issues.
Once you’re used to setting up and conducting podcast interviews, technical issues should be fairly minimal. They do, however, happen, and it’s best to accept the fact that they can and do happen, no matter what hardware and software you are using.
For this reason, it’s best to allow for at least an hour of your guest’s time per interview, in case you need to disconnect and restart the call, figure out why you can hear them but they can’t hear you, etc. When you’ve got a big interview at stake, you need to leave yourself some margin so that glitches aren’t dealbreakers.
All of this leads to the conclusion that if you must go with free software, you’re probably going to need to use Skype.
While Skype used to be a go-to platform for recording podcast interviews, it is no longer the best route. The benefits of using it are that you don’t have a time limit on your conversations and you can split your audio tracks. Meaning, your voice track will be on a separate track from your guest.
When you can split your tracks, any unwanted sound on the track of the person not speaking can be deleted easily without interfering with your interview. You can see the benefit of this if a siren, barking dog, or other audio interruption happens on your end when your guest is speaking. In such a case, you can just erase that part of the audio from whichever file it is on, like it never happened.
The fact that tracks can also be split on both SquadCast and Zoom, however, make this one benefit of Skype irrelevant compared to the negatives, IF you can afford to pay for a Zoom or SquadCast account instead.
The downsides to Skype include poor audio quality, a less consistent audio connection than SquadCast and Zoom, and a clunky recording set up.
If you use Skype, you can record using a third-party app like Pamela to save your call, or Skype Call Recorder plus Ecamm Movie Tools.
You could also save your recording through Skype, but it will mix down the tracks into one MP4 video file. Even if you separated your audio file out of this video file, you’d have both voice tracks blended into one file instead of split tracks. This is difficult and time-consuming to edit, and in some cases, it will be impossible to remove sounds without losing some of the conversation.
Lastly, your guest would need a Skype account in order to receive your call. Though Skype is free, it is not uncommon to have a guest give you a name to “call” them with on Skype, only to find there are several people with that name. This can waste time and cause confusion.
When it comes to recording your podcast conversations, you are better off with a paid-for option to save time and sanity.
Paid options for recording remote conversations
Zoom ($140.90 annually or $14.00 monthly)
SquadCast ($20/monthly)
Both of these programs are excellent, paid options for recording your conversations.
Zoom is now the platform many companies turn to for podcasting. The fact that many companies already have a paid account for meetings makes it almost feel free — with regard to your podcast, anyway.
Paid accounts on Zoom begin at an annual payment of $140.90 (or $14.00 monthly) for group meetings up to 30 hours long — enough time for even your most in-depth interviews.
Zoom also allows you to split recordings into individual audio tracks for each speaker. The only thing Zoom doesn’t do is provide lossless audio the way SquadCast does. Just the same, for many companies, Zoom is the go-to for podcast recording, providing more than sufficient sound quality.
SquadCast also enables you to conduct remote interviews with ease and provides the best audio-quality available through lossless audio. This program also allows for separate tracks for each speaker to be saved.
Whichever software you choose, platforms like these make it easier than ever for anyone to start a podcast.
Don’t Forget Your Host
In addition to editing software and an interview recording platform, you will need a subscription to a podcast hosting service.
This is like a web hosting service, but specifically for podcasts. There are numerous services to choose from. Just a few examples are Libsyn, Podbean, and Buzzsprout. There are many more, and pricing varies and usually comes in a choice of monthly or annual fees.
Whichever hosting service you choose, check to make sure you select one that has the ability to send your RSS feed (the link information from your podcast’s host location) out to as many directories as possible.
For example, some platforms enable you to post to each of the main podcasting directories, such as Apple Podcasts, Spotify, Google Podcasts, Amazon Music, Stitcher, iHeartRadio, Pandora, Deezer, and more with the click of a button. This feature is a big plus.
Getting Started with Episode 1
This article has covered a lot of ground thus far. Taken a step at a time, it’s more than doable to start your own podcast. A great way to stick with it for the long run is to use systems. These will make it easier for you to keep your show going.
Using systems means setting up routines to make things easier. An example would be using the same music file at the start and finish of your episodes, and recording a brief and generic “Welcome to the podcast” intro for use on every episode before each episode’s specific topic introduction, and guest bio.
Breaking your episodes into segments will allow you to get some of the pieces ready before the interview, when you have smaller blocks of time. This may include a pre-recorded introduction about the episode (your “episode intro”), your guest’s bio (if you have an interview format), as well as a pre-recorded “outro” that wraps up the episode.
You can also separately record any promotions you have running, so that you can drop them in and reuse them whenever you want to promote that specific item, event, or service. This also works for recording sponsorship messages.
Why Do I Need an Episode Intro in Addition to My Guest’s Bio?
This really applies to the interview format podcast, rather than a solely educational format where you speak directly to your audience.
Recording a guest’s bio separately from the specific episode intro can be helpful for two reasons.
First, it again gives you the opportunity to tackle each small segment when you have a small block of time. Working this way makes it easier to not lose your place in your recording if you have to jump in and out. Then you can leave your longer interview segments to edit when you’ve got a larger block of time to do so.
Second, while you will be reading your guest’s bio, it’s important to stay connected with your audience by spending some time speaking directly to them at the start and finish of the episode. This keeps the show from either sounding stiff and distant, or from sounding as if you’ve forgotten your listener is there.
It’s important to not seem as though you’re taking your listeners for granted. Don’t make them feel as though they are an outsider eavesdropping on your interview. Bring them into the room, with a, “Hi there, today I’m excited to bring you an interview with….” type of intro. You can also take care of any housekeeping messages here (such as “don’t forget to leave a review” or reminder of upcoming events) before getting to the “formal” bio.
A good way to keep listeners engaged as you’re reading someone’s bio is to envision that you are speaking TO your listener, sharing this wonderful person’s accomplishments with them. This helps to keep bios as lively and un-stuffy as possible.
Your guest’s credentials are very important to them and to their credibility in your listeners’ eyes. When reading these credentials, however, it’s vital to really focus on keeping listeners engaged. To this end, if your guest has given you a bio that is several pages long, it’s best to read a shortened version and let your listeners know that they can find a complete bio (or list of awards, media appearances, etc.) in the show notes.
How Do I Tackle Delivering My Podcast Content?
 You may or may not need a script to follow for every episode, but you should at the very least have an outline. This might be true if you are very knowledgeable about the particular topic you are covering on that episode. Even so, it’s best to have as many notes as you require to prevent rambling.
For Interview and Co-Host Formats
A suggestion for keeping your place with questions for a guest is to place one question per page into a word file. You can then click to the next page after you ask each question. You could also go old school and write questions down, then simply cross off after asking each.
The one thing you do not want to do is type if you take notes, as this will be distracting to your guest as they try to answer you.
If you type while you are speaking, you will have a very tough job trying to remove the sound later, because both the clicks and your voice will be in the same track. Listeners do not like the distraction of typing sounds while people are speaking. Instead, keep a pad and pen handy to make notes to respond to points your guest or co-host makes.
When you have a co-host chat podcast you are less likely to need an actual script, as it may make your episode sound too robotic. You will definitely want to work from the same outline, however, to prevent you both from wandering hopelessly off-topic. Remember, your podcast is all about what you can give to your listeners.
Do I need a padded studio to record in?
That depends. If you are recording in a large room, you’ll want a lot of open space so that your voice doesn’t bounce off the walls (and floor, if the room has a hard floor). If you ware recording in a small room with hard surfaces, you will want to soften surfaces around you to reduce echo. This could even translate to using a walk-in closet that still has clothing hanging up around you.
If you are in a small room or closet that is empty, you might try hanging a blanket on the wall you are facing to see if that gives you adequate echo cancelling. If it doesn’t, you can attach 12-inch foam squares against that wall. This foam can be purchased in packs on Amazon or from other online sellers.
If you want to make an actual sound booth, a simple way to do so is to use 2” thick Styrofoam from a home improvement store. You can cut it with a carpet knife to create a booth with 3 sides and a top. If you find you want additional insulation, you can then attach foam squares to the back wall.
If you are set on making an actual sound booth like this, the benefit of using these materials is that they are light and the “hood” can be removed, if need be.
How Should I Set Up My Hardware?
USB option:
Since you will need to connect your microphone to your computer, using a microphone with a USB connection is recommended. That’s because, as you will see below, when you get to the XLR option, you are getting into sound studio equipment. If you’re looking for plug and play, you want a USB microphone you can plug directly into your computer.
Once the microphone is plugged into your computer, open the sound settings on your computer and make sure your input is set to your microphone. You will also want to check the audio settings in your software preferences and set it there, if needed.
XLR option:
If your microphone is an XLR, you will need to either use a USB interface to record from your microphone to your computer, or you will need to connect to an external recording device. Here are examples of each:
USB Interface: Scarlet Solo
External Audio Recording Device: Zoom H4n
What’s the Correct Microphone Technique?
Learning how to properly speak into your mic will prevent popping your Ps or creating hissing “S” sounds. If you have trouble with these issues in your recording, move your mic slightly off to one side to avoid breathing directly at it.
Be sure to check the instructions for your particular microphone regarding angle. Some microphones should be set up on an angle toward you, whereas a Blue Yeti should be set up at approximately a 60° angle away from you.
Make sure your mouth is at the correct distance from your microphone. Again, this will depend on your particular microphone, so be sure to look for the recommendation for yours.
Do a test run before you record your first episode. This will do two things. It will help you establish the right location and distance for your microphone. It will also help you get used to the sound of your own voice.
Hearing the sound of your voice can be a little awkward, like watching yourself on camera for the first time. Remember, we spend our lives hearing our own voice from inside our own bodies. It may take some getting used to hearing it played back to you.
Don’t let this put you off, however. The more episodes you record, not only the more used-to your own voice you will be, but the better you will be at modulating your voice for clarity and optimal pitch. Your recordings will become more consistent over time. Your biggest challenge right now is to just keep moving forward. Remember, you can edit your episodes to make them as polished as you like.
How Do I Start?
Don’t worry yourself too much when you are ready to begin editing. Remember that over time this will become a familiar practice. We have talked about segmenting your content to make editing easier, such as a pre-recorded standard intro and a theme song. Let’s look at each element of your podcast.
Your Intro – The Shoulders of Giants
The best way to figure out what a great podcast sounds like is to listen to podcasts.
By listening to an excellent podcast in the same format you intend to use, you’ll learn what a great intro, consistent pacing, and good theme music sound like. You can even use the intro of a podcast you like as a template for your own; just be sure to actually make it your own by changing the information around. You can adopt the pacing and information included, to fit your show.
For example, here are some steps you might follow to create an intro:
- Welcome your guests using the podcast name
- Introduce yourself
- Tell them in one concise description who the podcast is for
- Tell where they can get more info/show notes
An example of what these steps could look like:
- Welcome to the (insert name of podcast) Podcast.
- I’m your host Julie Smith
- If you are looking for answers to your claim questions, this podcast is for you
- Don’t worry about taking notes. I’ve got you covered at…(Your website)
This four-step formula is all you need to start with a solid intro you can use for every episode that brands you and your show as the go-to podcast for free help with legal issues.
Do I Need Music?
The short answer to this is YES. Not only do you need music, but you should take the time to select music you love, whose pace and style reflect the tone you want for your show. You will be using this same music for every intro and every outro to help brand your show.
Don’t worry about it being repetitive from show to show. That’s the point. You want your listeners to hear that music come up and subconsciously know it’s your show. Can you remember what the Jeopardy game show music sounds like? Your show’s music will become part of its brand recognition.
No matter what theme music you choose, it’s vital you choose royalty-free music to avoid getting into trouble.
You can sample different types of royalty-free music at:
Audio Jungle (as little as $1 for one track)
Audio Blocks $15/month (less if you purchase annually)
Music is powerful.
Remember the theme to the movie Jaws? Think about the feeling you want to inspire when your music queues your show up. Inspiring? Happy? Ominous? Powerful? Make a list and sample many tracks to see which style rises to the top.
Since you won’t want to vary your theme song often, if at all, and you just want the one track, Audio Jungle may be an ideal solution. Keep in mind, however, that if you do have need of additional sound effects or music, it will need to be purchased à la carte.
With Audio Blocks, you will have access to thousands of soundtracks. This means you can swap out your music for every episode if you choose, but it’s not a great idea for your branding.
What you can do with an Audio Blocks account, however, is select sound effects as you need them to add impact to your show.
This should not be overdone, but you can use shorter 1-3 second sound effects to great advantage in your transitions.
For example, using a “whoosh” or other short sound that is non-startling is a great way to transition from your guest’s bio to the actual conversation that follows.
Since the bio will be recorded on different software than the recorded interview, using a short sound to transition from one audio “room” to another is a great trick.
How Do I Edit?
You can find lots of online tutorials on the specific software you choose to edit your podcast, but here are some tips that will prevent headaches from the start.
- Segment Your Tracks
Remember the recommendation to break your recording into segments? This will make the editing process easier and a lot faster, when it comes to things you will use and reuse.
Some items that are ideal for creating short segments are:
- Teaser
- Intro – Your generic introduction (previously mentioned that is the same before specific episode info.)
- Your music track
- “Commercials,” including “This episode is sponsored by…”
- Invitation to leave a review (Should be at least part of every outro. You can also drop it in after your generic intro and before your specific episode intro, as it can be a good transition from promoting the show to telling your listeners about the specific “guest of the hour.”)
- Outro – the wrap-up
We haven’t discussed the teaser yet, but when you begin listening to podcasts, you’ll notice that many employ a lead-in that consists of the equivalent of a “pull quote” — something fabulous the guest says during the interview, pulled out into a short quote. As you edit your episode keep an ear out for a sentence or two that will work well as a teaser that will be the very first thing your listener hears after the music starts to build.
While your generic intro will be the same from episode to episode, you may want to make your outro unique for each episode, saying something like, “This wraps up our interview with ___, join us next time for an interview with______”
Doing this turns your outro into a teaser for your next show.
- Split Your Speaker Tracks
Whenever possible, split your speaker tracks so that you have one per guest. You can check the specific instructions for the recording software you use for interviews or a co-host chat show.
For example, when in Zoom, you can go to Preferences, then Recording, and make sure the “Record a separate audio file for each participant” is checked.
It’s also helpful to check the “Automatically record meeting” box when you schedule an interview — and double check that you are in fact recording during every interview. You don’t want to realize after an amazing guest wraps up an interview that you forgot to hit “Record.”
- Stay Organized
This one sounds like a no-brainer, but it’s important to have a system even with regard to how you save your files. Each episode will include audio files, notes that you will derive your show notes from, and images to use for promoting your show in social media and to spruce up your show notes page.
To keep all of this straight, you could, for example, start with a folder with the episode name and number (always using the same naming convention to make it easy to find episodes at a glance).
Inside the main folder, you could have a folder for the audio links, images, social media files, and notes.
You may want to use the episode number in each file name, as well, to avoid accidentally saving a file into the wrong folder and overwriting it.
- Establish a Routine for Editing
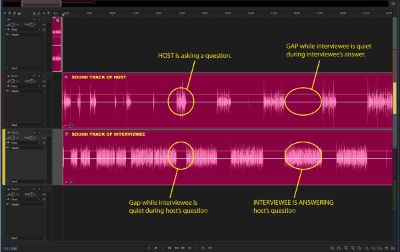 When you edit each of the tracks of your interview, you will go through them one at a time and eliminate the major audio flubs. When you are done, you will line up the tracks so that the guest’s voice follows the lead of the host at a natural pace throughout the interview.
Why would you have to mention this? Take an example of a guest who takes long pauses and says “um” too frequently to leave all of them in. A few will sound like normal conversation, but sometimes your guest will say “um” after every few words. In such a case, you will want to delete at least some of the “ums.”
At the end of editing all of the “ums” out, your guest’s track is going to be shorter than yours. You will want to line the tracks back up, starting with your first question, then making sure you remove the extra space between your question and the answer of your guest.
The key here is to make sure you always leave the gaps between your questions in place, and always leave the space between the answers of your guest in place. In the end, you can tighten these up by taking out extra space. When you look at the two tracks properly aligned, the spaces will coincide with the other person’s talking, as this example shows.
When you create a routine for yourself for editing, it can be helpful to do things in the same order each time, to make the process more and more automatic. This could be as simple as always starting with editing the host soundtrack first, then the guest soundtrack.
An example of a routine for an interview-style podcast might be:
- Pre-record and edit episode intro and/or bio and outro before the interview.
- Research your topic and send your guest interview questions a few days early to make any necessary adjustments
- Record your interview
- Set up the season (you can see this in the image above. It is the window that each track gets placed into in rows and segments
- Edit host track for verbal flubs, gaps in spacing, rambling
- Edit guest track for verbal flubs, gaps in spacing, rambling. Listen for and copy teaser out of interview into new segment to drop in right after music starts and before generic intro comes in.
- Align guest track responses to host track questions, removing unnecessary space between each person’s question or response to remove unnecessary dead air.
- Add in and adjust spacing of intro, plug for reviews, specific episode intro/guest bio (may be 2 separate tracks or one combined)
- Add outro
- Save entire file and export as mp3 track
- Use Fades to Smooth Out Transitions
Use the editing programs fade effect when music begins and ends if your music track isn’t the exact length you need it. You’ll want the music to build in volume, but not so loud it obscures what the speaker is saying. Music is best kept at the beginning and end of the podcast, as “bumpers.”
- Add A Signature Line
Brand your show further by closing with a “signature line.” This will be something recognizable to your listeners that you say as a closing “period” to every show. It may be something as simple as, “Thank you.”
Here are some other examples:
“Bye for now.” (Marketing podcast)
“Until next time…go make something.” (Podcast for artists)
“Make this your most epic month yet.” (Sales coaching podcast)
- Be Careful Not to Get Too Obsessed with Editing
As mentioned earlier, audio quality is important. Editing should not, however, become so cumbersome that it takes a prohibitively long time to produce an episode. Done is always better than perfect. If you want a professionally edited podcast, you might consider hiring a podcast editing company.
Time to Export and Upload
As with any software, you will want to save frequently when working on your individual podcast tracks, as well as within your session window. Once you have finished editing tracks and aligning sessions, it’s time to export your episode for upload to your podcasting host’s platform.
Check the software of your podcasting host service to see what format they prefer you to export your saved episode in. It will be a Wav file or an MP3.
Check the bitrate
When exporting an MP3 format, set the bitrate to the right number. Spoken podcasts (interviews and educational episodes) should be set at 96 kbps.
Podcasts that showcase a lot of music should be set to 192 kbps stereo.
What are ID3 tags?
These are a type of meta tag that gives your media player the right episode information. This information is usually imported via the RSS feed automatically. The information could, therefore, be lost if someone shares an episode directly as an individual audio file instead of through a directory’s share function.
To ensure ID3 tags are embedded in your content, it’s good to use a hosting platform that provides your ID3 tags automatically. You can ask various platforms you are considering if they take care of ID3 tags.
Uploading Your File
Time to upload. Log in to your podcast hosting platform and go to the upload area. Most podcasts allow you to simply drag and drop, or else use an upload button to find your episode on your computer.
Be sure to add in the episode name, number, and details to your episode interface.
Your Podcast Artwork
 It’s finally time to create the artwork for your podcast. This is best left to the end of your launch process, as your own concept of your show’s identity can shift while you are building your first episode and laying the foundation for all subsequent episodes.
If you have design experience, you can make your own art using a program like Adobe Illustrator, Adobe Photoshop, or Sketch. If you aren’t familiar with graphic design, you can use Canva, or reach out to a designer through a website like fiverr.com or 99Designs.com.
Big Impact at a Small Size
Remember that the content, not the pretty artwork, is what will make or break your show. That said, the show artwork is the first thing people browsing for a great new law podcast will see. Think of it the way you would a book jacket.
Your format should be a square, and though you will submit it at a larger size of 3000 x 3000 pixels, it will often be displayed in the small postage-stamp size online.
This means it has to be impactful at a “postage stamp” size. What will show up when it is seen that small? It should be dynamic and identifiable.
Technical Requirements Snapshot:
- Dimensions: 3000 x 3000 pixels
- Colorspace: RGB
- Resolution: 72 dpi
- File Type: JPEG or PNG
Some design Tips {https://www.buzzsprout.com/blog/10-tips-create-awesome-podcast-artwork}
- Branding Consistency
- Choose colors that coincide with your existing website branding
- Use fonts from your existing website branding
- You can use your logo if it is simple and impactful, but you may want to create a new podcast logo that ties into your website’s existing branding (for instance by using an element of your logo but not the entire logo) if your business is already well-known and selling products. Remember the goal to engage with clarity. Buyers will be looking for your website. Listeners will be looking for your podcast.
- Use graphics/art that visually informs the viewer of the subject
It’s not a good idea to use complicated imagery here, or pictures of microphones or podcast-type equipment, as they do not say anything about your topic.
- Keep Words to a Minimum
Remember that your art must be impactful at a very small size
Don’t Forget to Pull Your Branding into Social Media AND Create Print-Ready High-Resolution Versions for Other Promotion Types
Your podcast artwork should be adaptable for use in social media formats and for print to promote your episodes using a variety of marketing channels.
Social media dimensions change from time to time, but currently, social media graphics sizes are as follows:
Pinterest: 1000 W x 1500 H px
LinkedIn: Facebook, Twitter: 1200 W x 627 H
Instagram: 1080 x 1080
Instagram story: 1080 W x 1920 H
YouTube: 1920 W x 1080 H
What Is a Podcast Description?
The description is part of your show’s metadata, which means one of the components of the descriptors that include name, episode number, release year, and description. Filling out all of this information when you post each episode is how you optimize it for maximum visibility across the various podcasting platforms of Apple, Spotify, Google Play, iHeartRadio, and others.
Your description should be a concise paragraph that clearly explains what your podcast is about and who it is for. It’s important to make it engaging to encourage subscribers, but don’t sweat this too much, as it is editable even after you publish.
Your show notes can elaborate on the content of each specific episode and be several paragraphs long.
When you upload your show to the hosting platform, be sure to select a category that it fits into well. You will be able to choose three categories. The first one is the most important, however, it is the only one that Apple Podcasts is interested in. Likewise, it’s important to be aware that Apple Podcasts is still the leader in podcasting platforms. While you’ll want to submit your RSS feed to as many podcast platforms as possible, the one you will get the most downloads from is going to be Apple Podcasts. The #1 podcast directory in the world, Apple Podcasts currently has over 800,000 podcast listings.
What’s Your Sub-Category?
Designating a sub-category is better than staying in the higher-level, general category in your industry IF there is a sub-category that fits your podcast.
For example, if there is a sub-category of Personal Injury within a Law category, it’s better to identify your podcast by both than just in the general Law category.
Law > Personal Injury is better than just Law.
If your practice area is not listed within your category, try to select the closest subcategory you can that still applies to what you do. If none of the sub-categories apply to your practice area, then you are better off in the general category of Law or Attorneys, etc. You don’t want to choose a sub-category that will bring the wrong listeners to your show, as that just creates frustration and may keep away people who would be interested in your podcast if they only knew what you were about.
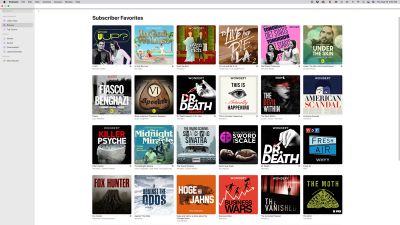
Don’t Forget to List Your Podcast in Podcast Directories
As mentioned before, different hosting platforms will assist you to different degrees with getting listed on podcasting directories. A directory is a place for listeners to discover new podcasts.
Because directories are often added to the pool hosting platforms help you list with, it’s best to look at how many directories each of the platforms you are considering help you get listed in, as we’ll as how much they help you. The best ones make it as easy as possible, through copying your RSS link and clicking buttons to walk you through the process.
Your Launch Options
A final consideration when you launch your podcast is whether to open with a flourish or a “quiet” open.
Option 1: Go Big
If you want to “go big,” you will want to start promoting your upcoming podcast in your newsletters and possibly through some digital advertising, whether on social media or influencer websites. You may also share it with people who would be your ideal audience and get them to review it as soon as it is uploaded.
You could also work to get yourself interviewed on other influencer podcasts in your market about your upcoming show.
One way to make a “grand opening” style launch is to create a batch of at least ten shows and upload them all on launch day.
The benefit here is that anyone who finds you won’t just see one episode and be left to wait wonder if you’re going to actually publish again according to your promised publishing frequency. They can see that you’ve produced at least 10 or 12 episodes.
If you are able to gather several episodes and launch this way, it also creates a bigger splash in the algorithm of directories like Apple Podcasts.
Option 2: Quiet Open
If you’re just too busy or need something up quickly to coincide with a promotion or event, you may go with publishing one episode to start. This will create less of a splash, but also comes with a much smaller amount of pressure.
If pressure is your motivation in avoiding a grand opening style of launch, just remember that with each episode you upload, the easier it will become to keep producing.
If your budget does not allow for a lot of ads, your audience will likely grow slowly and organically. That’s okay. Your podcast will grow over time. The most important things you can do to keep it growing are:
- Provide valuable content with your listener in mind
- Keep producing regularly
Look at it this way, if you publish before you’ve spent time and money promoting your podcast, there is absolutely no pressure. In fact, it’s best to assume no one will hear your first episode — and do it anyway.
That’s because once you publish, some tiny micron inside your brain will change, because you’ve actually published. And you will get listeners. And if you commit to producing episodes regularly, your podcast will grow.
Promoting Your Podcast
 As your stats go up over time, be sure to share your podcast’s growth over social media. You may also choose to create graphics for social media that incorporate an animated audio signature element to them, using a platform such as wavve.
Get Social
Another way to share your podcast is through Facebook and LinkedIn groups for your industry. If you do this, be sure to ask the group’s admin if it’s okay to post your podcast’s address, or you will get kicked out in short order.
Look for Opportunities to Help on Social Question-and-Answer Websites
Check out websites like Reddit and Quora and answer people’s legal questions.
If you do this, it’s important to truly answer their questions in full on their platform, as it is not ethical to lure them to your website or podcast platform to get the answer that has been posted there.
When you thoroughly answer legal questions in their platform, you can then list your podcast as a, “For more information on this topic….” And provide the link to your podcast at that URL you are forwarding to your website. This will allow them to check out and then subscribe through whichever podcast directory they prefer to listen through.
Cross-Promotion
Get creative with cross-promotion. If you know a blogger or YouTuber who’s in the same sphere as you, you can offer to promote their blog or channel on your podcast in exchange for them promoting your podcast on their blog or channel.
Audio Ads
Check out advertising on a podcasting app, such as Overcast. This can be an effective way to get new subscribers. While it’s not free, if your podcast falls into a category they target, it can put you in front of a more relevant audience than the same spend in a non-audio venue such as a magazine.
Make it Easy for Others to Share You
In closing, don’t forget the simple step of sending social media images to each of your guests to share with their audiences when you send them the “Your Podcast Interview is Live!” email. This is a great way to leverage their email lists, as they promote your podcast out to their followers. Everybody wins.